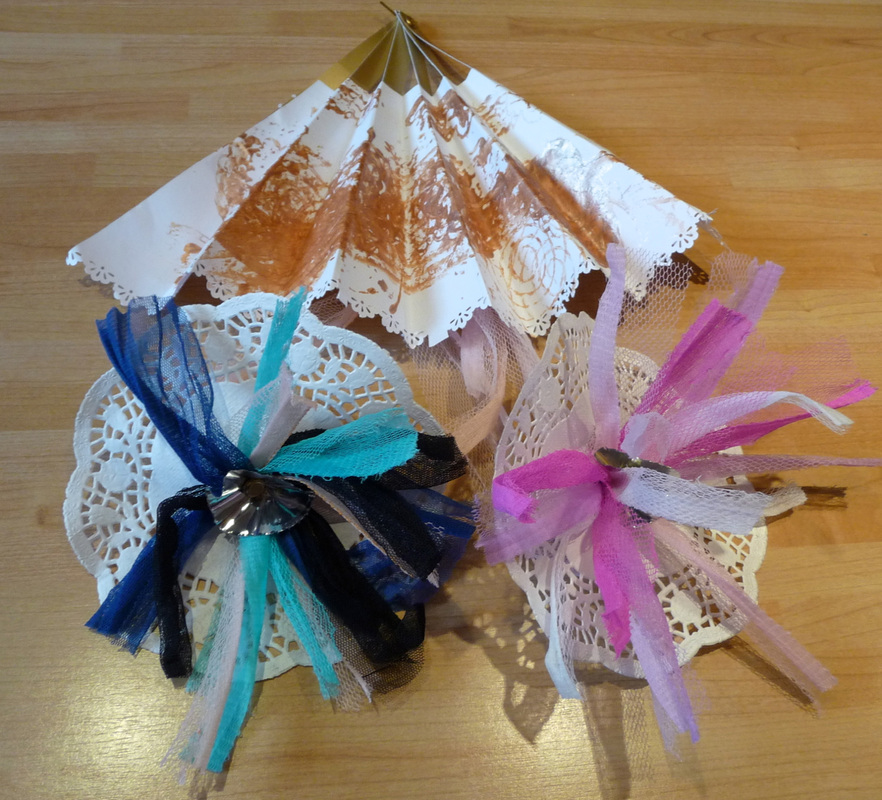
May Day! May Day! Oh OK, it's a bit late, but that was the theme for Friday's session at The Little House in the Park, and we're feeling extremely springy here in sunny Bath this Bank Holiday weekend.
All of these things - giant flower, May crown and spring streamer stick - are pretty straightforward and self-explanatory really, so I won't go into lots of explanation about how we made them this time.
It was such a lovely afternoon. At the end we took all the crafts outside into the garden and danced round a maypole, singing traditional songs. It got a bit much for some of the children after a while and we ended up in a big tangly hysterical mess. One of my favourite days at The Little House ever.
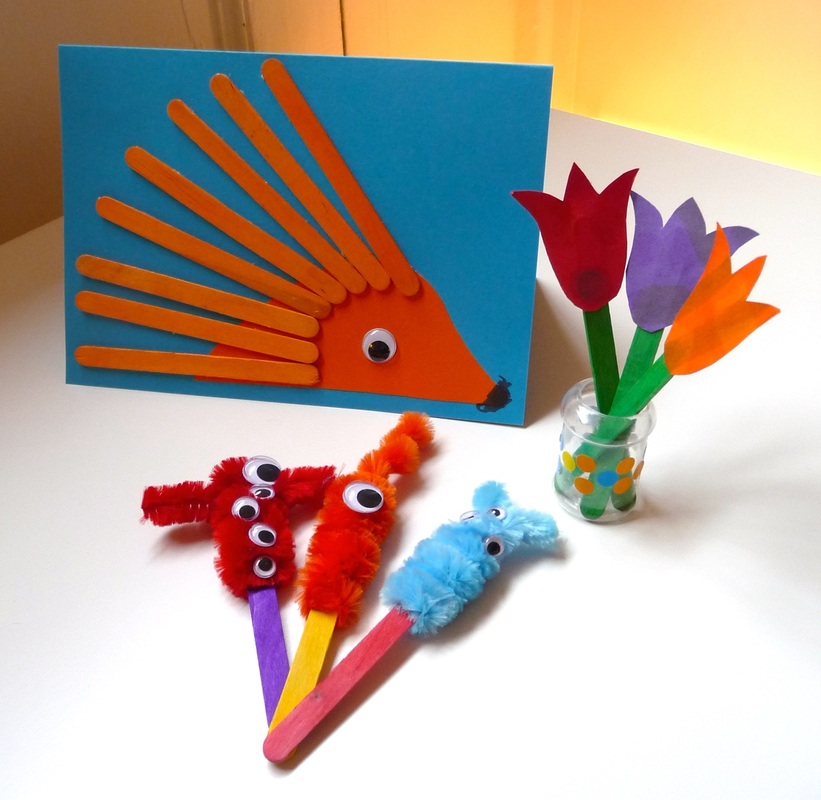
I was in a multicoloured lolly sticks kind of mood today - luckily we have a bumper pack of them in the cupboard. Phew.
For the porcupine card, I cut a body shape out of orange card and then we glued that and the orange sticks onto the blue card, added a googly eye and coloured in the nose.
The monsters on sticks couldn't be easier to make - just wrap pipe cleaners around sticks in whatever shape you fancy and add googly eyes (we used extra big fluffy pipe cleaners). Matthew's passion for googly eyes apparently knows no bounds.
For the tulips, we painted some bits of card first (quite subtle here but you could go wild), cut out the petal shapes when they were dry, and glued them onto green sticks. The vase is an empty plastic vanilla essence bottle with its top cut off. Matthew took ages decorating it with dotty stickers in an impressively painstaking way. Blimey. This is new.
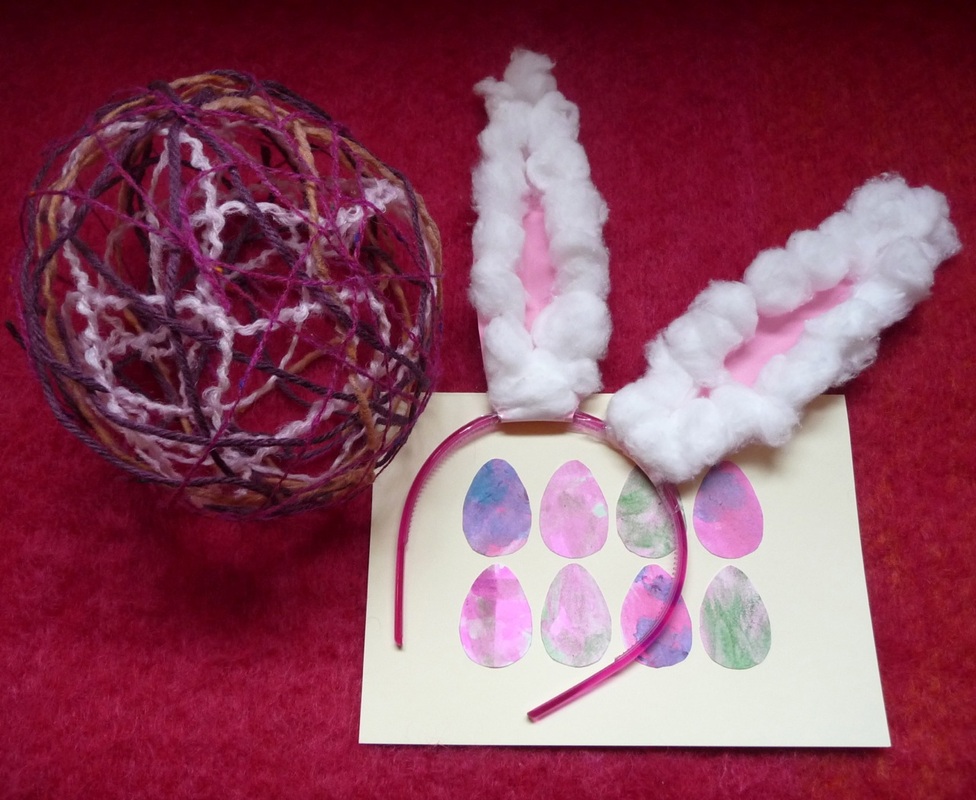
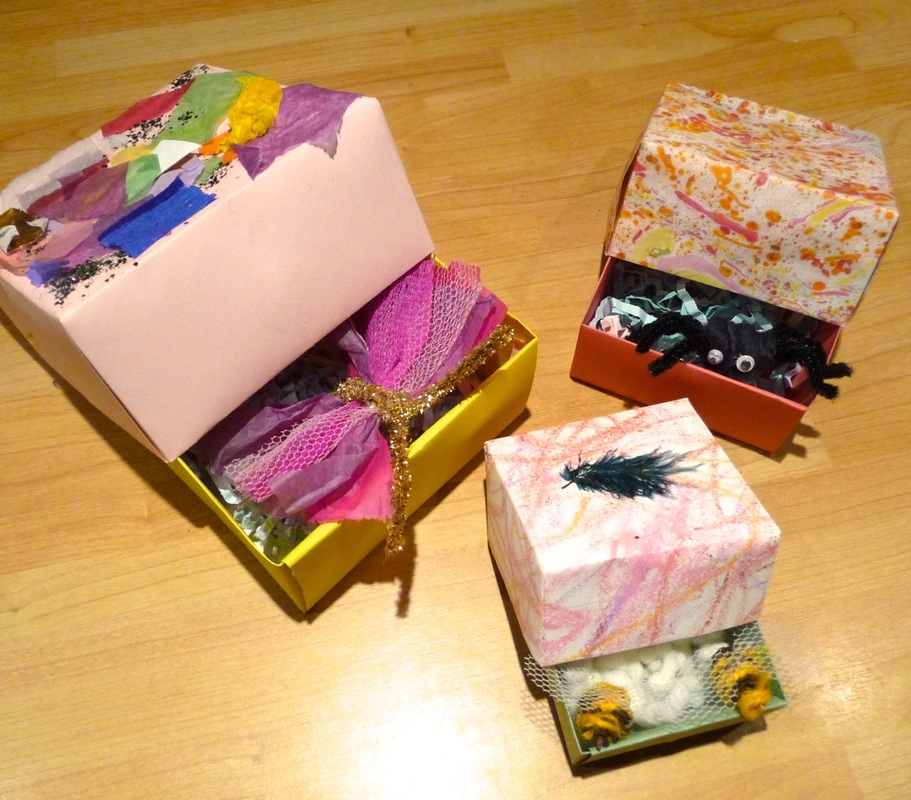
It's nearly Easter, so no big surprises here: it's all about the bunnies and eggs this week.
The woolly egg is something we made at The Little House in the Park. You need a partially blown up balloon, lengths of wool in different colours, and some watery glue. Just dunk the wool in the glue and wrap it round the balloon in lots of layers. When it's all dry, pop the balloon, and voila! A woolly egg. I think we could have done with using a smaller balloon and more wool, but it's still pretty effective and I love this idea. Wonder if it would work with balloon animals...?
For the card we used paint pens, which dry in really nice pastel shades. Matthew did loads of painting on different bits of paper and then I cut out some egg shapes from them which we stuck onto cream card.
The bunny ears are just cotton wool glued onto pink card cut and folded into ear shapes, then taped onto an alice band. I had to use quite a lot of tape to keep them upright - anyone have any tips about this?
Anyway - Happy Easter. May your eggs be of the highest quality chocolate.
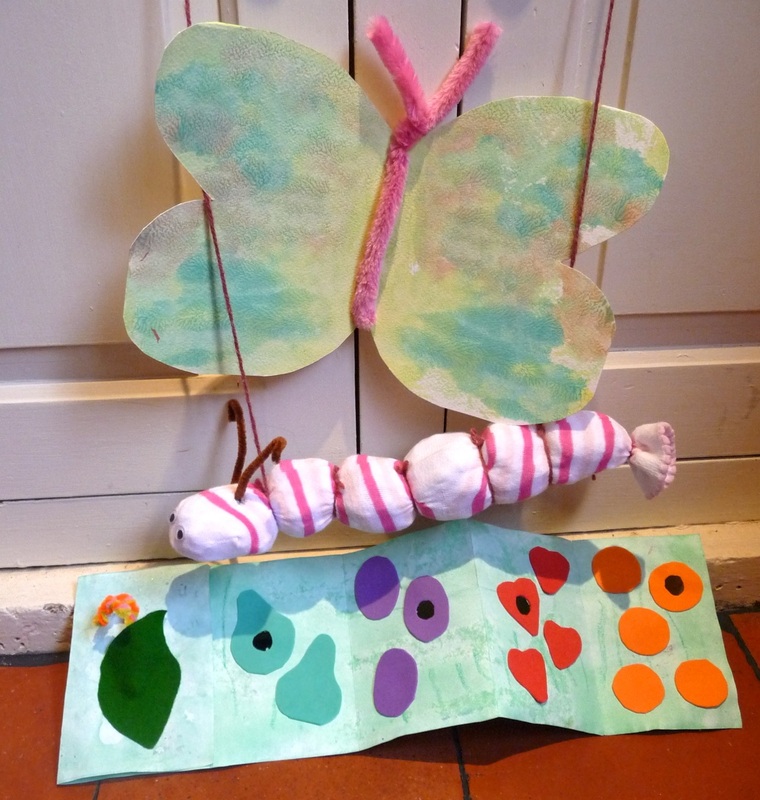
Last week at The Little House in the Park we did some book-related crafts, to mark the end of Bath's Literature Festival. The Very Hungry Caterpillar was a good choice - everyone knows it, the story is nice and simple, and there are lots of colourful pictures to draw inspiration from.
First we made a lovely big butterfly, by blobbing lots of paint on one side of some thick folded paper and then pressing the two sides together to make a mirror print. We cut the shape out when it was dry, and added a pipe cleaner body.
Next we stuffed a stripey sock with scrunched up tissue paper, tied it with wool, and added googly eyes and pipe cleaner antennae to make a caterpillar puppet. (This is Matthew's favourite: he likes bouncing it round the house doing squeaky caterpillar voices and finding new places to hang it.)
Finally, we made our own interactive version of the book. We started with a thin paint wash over both sides of a long strip of folded paper, and when that was dry we stuck the fruit on and cut out holes. The cover of the book is a green felt leaf with a pipe cleaner caterpillar nestled inside ready to take out and weave through the holes.
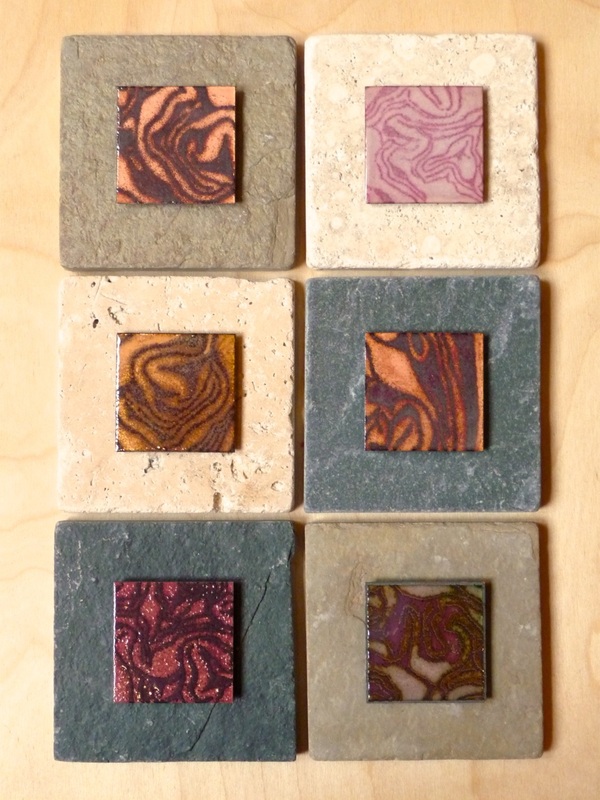
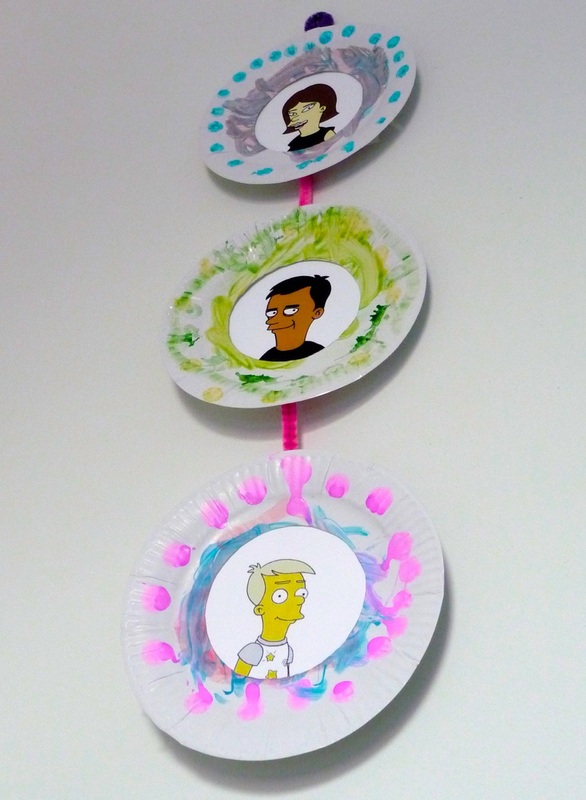
I was trying to think of something fun we could make with paper plates, and came up with this - paper plate picture frames.
Really straightforward - just paint your design onto the plate, cut a circle out, and tape your picture to the back. We had these Simpsonised photos of ourselves kicking around so decided to do a set of three to hang in a row (fixed together with taped pipe cleaners). Matthew really enjoyed making them and is delighted with the result (so am I!).
Here are some more ideas:
- create a pattern with sticky mosaic tiles or beads
- make a collage with tissue paper, petals or lengths of pipe cleaner radiating out
- (for older children) write out a poem or passage from a book in a spiral round the edge
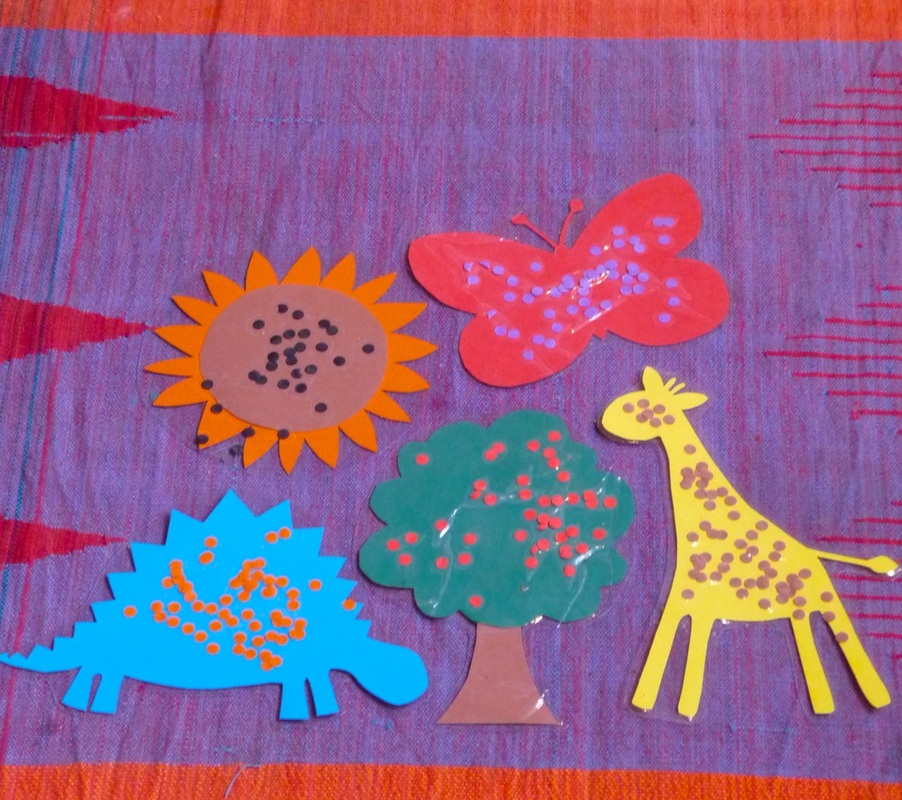
Ever since Matthew's first rapturous encounter with a hole punch, I've been trying to think of a nice crafty activity we could channel this passion into. Hm.
Recently I bought some A5 self-laminating pouches and have been wondering what I could use them for. Hm.
Bingo! I present you with: self-laminated dotty pictures. I did the shape cutting (obviously. He's 3), and Matthew did the hole punching and thereafter scattering of the dots. It was surprisingly tricky getting the pouches to seal without lumps and stray dots, but by about the fourth one we had it down.
I think they look pretty good but... that sunflower is a bit rubbish, isn't it. Good excuse to have another go sometime.


 RSS Feed