So the summer holidays have begun and we've come to the end of our crafty sessions at The Little House in the Park (*sob*). But we're still making stuff at home - and these are our latest creations.
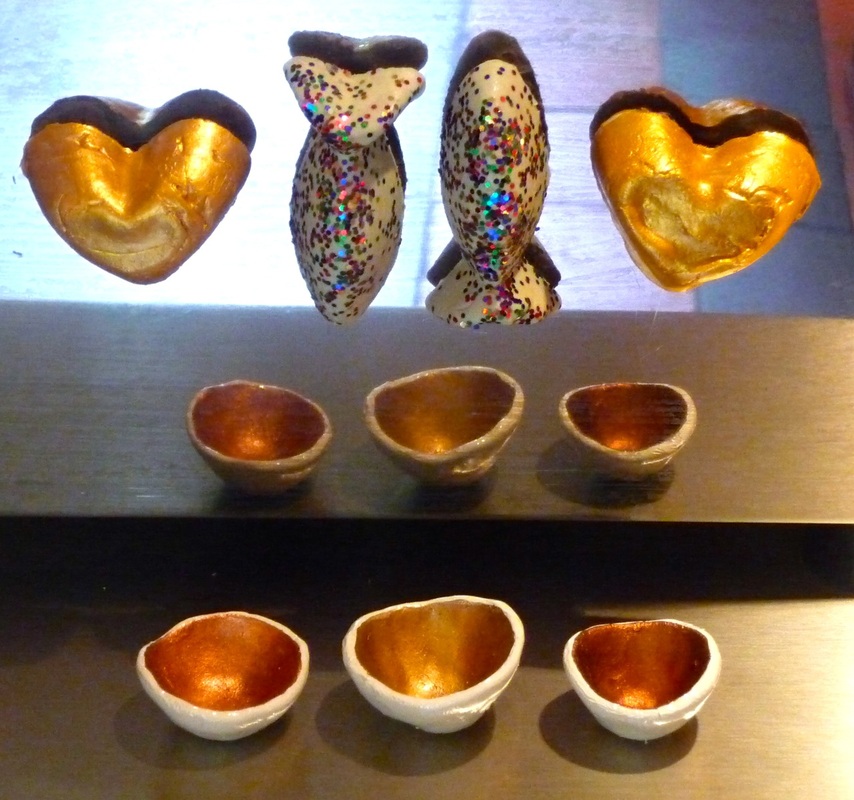
I had some air-drying clay in the cupboard so we got it out one morning and had a bit of a play. Matthew used some rubber moulds (from Ikea) to make fish and hearts. When the clay was dry we popped them out of the moulds and painted the hearts gold and the fish with glow-in-the-dark paint, sprinkled with glitter. When the paint was dry we glued magnets onto the back to make them into fridge magnets that we can give as presents.
I made the thumb pots while Matthew was playing with the clay, and when they were dry I painted them with white and metallic enamel paints.
Shiny happy clay crafts.
We were back at The Little House in the Park on Friday, celebrating the summer solstice with some seriously sunny crafts.
First we used fabric paints and pens on yellow t-shirts to make summer tops. Sorry, you really can't see in this picture but think yellow/orange/red paints with printing blocks of suns etc and you get the idea. All the kids loved doing their t-shirts - so easy to do. Just a shame I let Matthew wear his later when he was eating spaghetti bolognese for tea... *sigh*
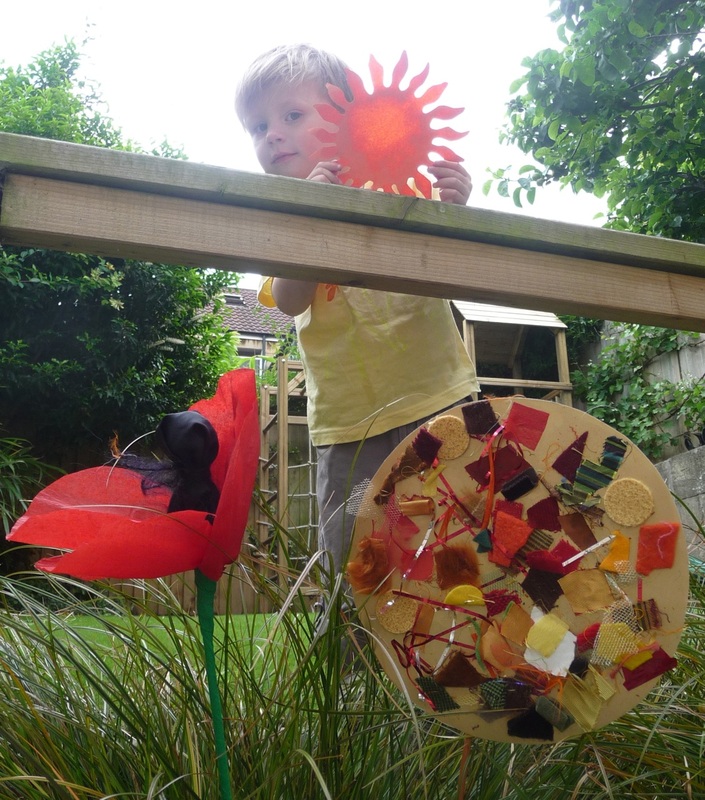
The collage on a stick is meant to be the sun (clearly). It would have worked better if I'd cut the gold card into more of a sun shape first but frankly I was just feeling too lazy.
To make the poppy, first we got a cotton wool ball and spiked it on top of a willow stick. Then we wrapped some black material over it with a rubber band, and tied some wispy bits of black wool around for the stamen. The petals are four pieces of red crepe paper, sort of stretched at the top and taped at the bottom. Then we got a long thin strip of green crepe paper and wound it round and round the stick to make the stalk. Looks pretty good, I think.
But my favourite thing is the simplest - the oily sun that Matthew's holding up. We cut sun shapes out of orange sugar paper and then just painted oil onto them - not all over but in dabs. When you hold it up to the light it's so effective - you can just about see in this pic. Now I'm trying to think what else might work well using this oily technique. Hmm... Any ideas?
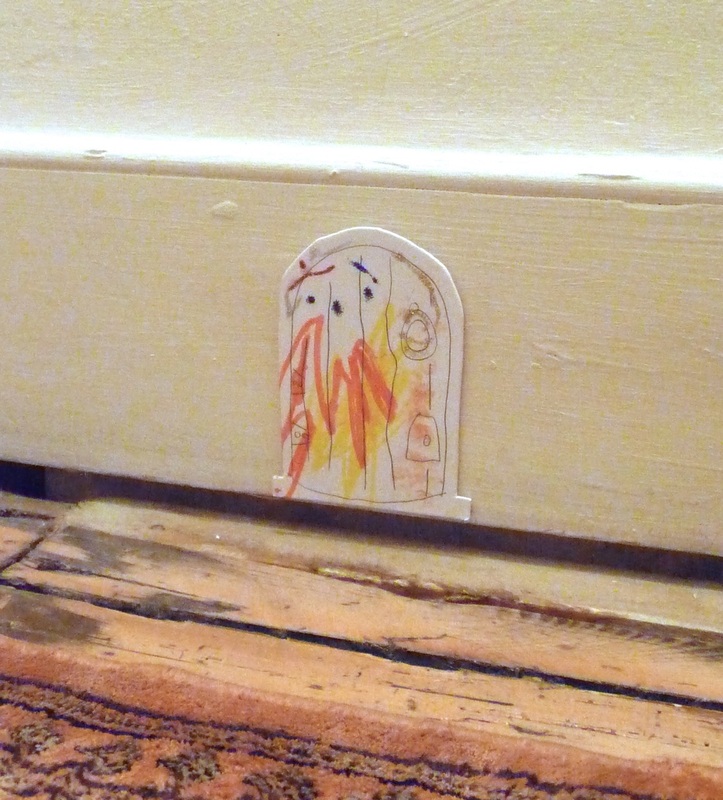
First of all, need to say this is not my own idea (nor was it made at The Little House in the Park) - but it's so damn cute I just had to share. We went to a children's activity last week, run by Kidzfun as part of Bath Fringe Festival. It was all about magical creatures - lots of small children running through bubbles pretending to be unicorns, that kind of thing. Worth going just for the experience of being in the wonderful Spiegeltent. Anyway at the end of the session we were given a little cardboard door to decorate. The idea is that you stick it on your skirting board and that's the door that the fairies use. Now clap your hands if you believe in fairies...
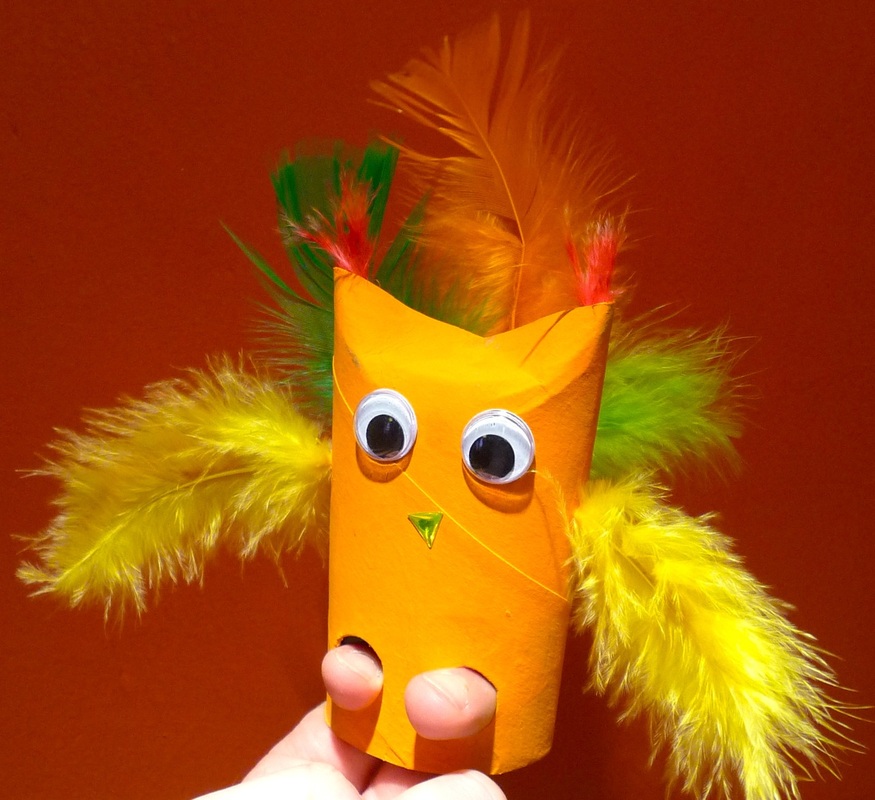
I've been trying to think of more loo roll craft ideas, and have come up with this nice easy project - a bird finger puppet.
Dead simple - take your loo roll and bend the edges of one end over, to make the ears. Then cut finger holes at the other end. After painting, stick on eyes and nose of your choice (I would have made a big pointy beak out of card or something, personally, but Matthew wanted to use a jewel sticker, and it is his puppet after all), and then add feathers (we made holes and pushed them in).
Here are some other ideas for loo roll finger puppets...
- other animals: lions, rabbits, dogs, jellyfish would work particularly well
- monsters: you could really go wild here and stick all kinds of bits and pieces on to make fantastical creatures
- robots: add the finishing touch with silver foil or silver paint
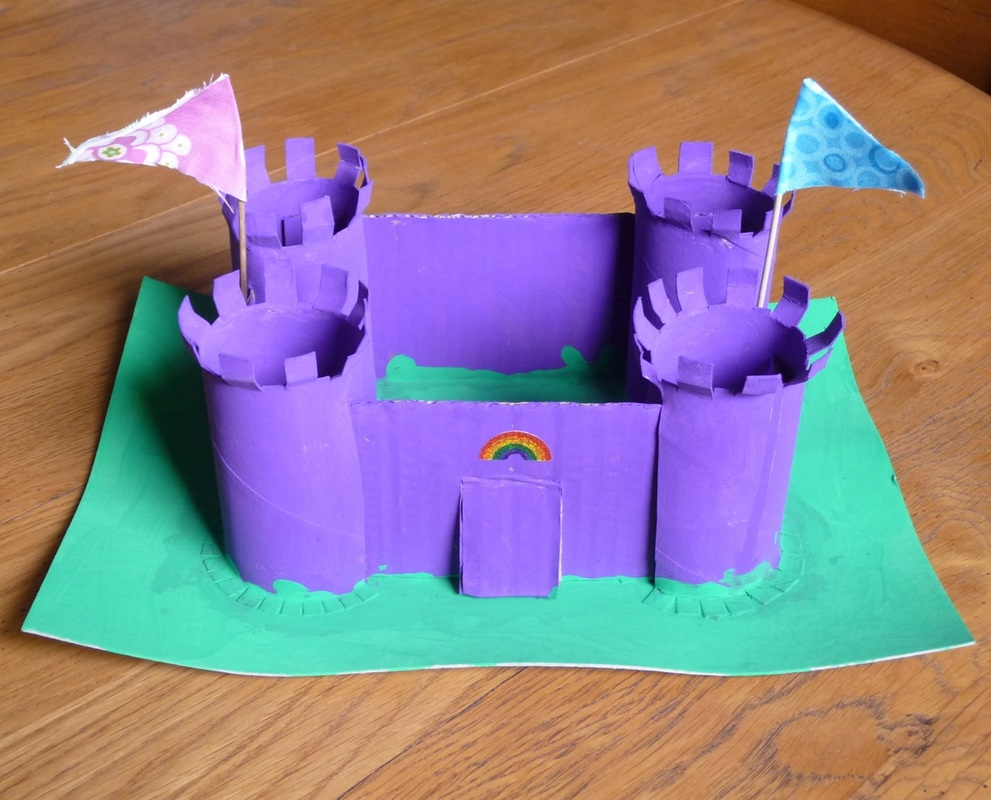
Matthew's really into castles at the moment, partly because of Mike the Knight on CBeebies (which has a particularly irritating theme tune that stays lodged in your head all day) and partly because we visited a couple of castles on holiday last month. We're going to get him a play castle for his birthday, but in the meantime I thought we could have bash at making one using loo rolls. So to make the towers, I cut out notches all round the top of four loo rolls, and then we folded the leftover bits down to make battlements. Then I made cuts all round the bottom of the loo rolls and we splayed them out for gluing later. I also cut two long slots up two sides of each loo roll. For the walls I cut up pieces of cardboard box and then fitted them into the loo roll slots. We cut a doorway before gluing the splayed bottoms of the loo roll towers onto a base of stiff card. We painted the castle (purple, obviously), and then when that was dry we painted the base. We found a rainbow sticker for the crest over the door, and some bits of material to make flags (glued round toothpicks).
You could easily adapt this basic design to make more complex layouts with more/taller towers and walls.
May Day! May Day! Oh OK, it's a bit late, but that was the theme for Friday's session at The Little House in the Park, and we're feeling extremely springy here in sunny Bath this Bank Holiday weekend.
All of these things - giant flower, May crown and spring streamer stick - are pretty straightforward and self-explanatory really, so I won't go into lots of explanation about how we made them this time.
It was such a lovely afternoon. At the end we took all the crafts outside into the garden and danced round a maypole, singing traditional songs. It got a bit much for some of the children after a while and we ended up in a big tangly hysterical mess. One of my favourite days at The Little House ever.
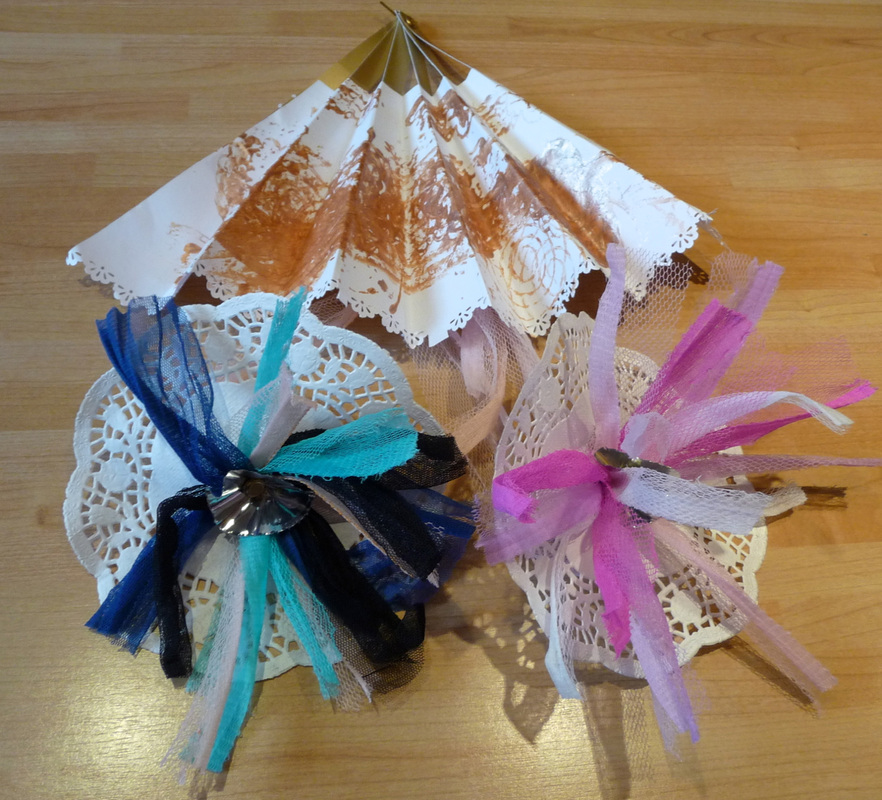
Back at The Little House in the Park today for the first time in ages. W e started off in the Holburne Museum to get inspiration from the Painted Pomp exhibition (early 1600s art and fashion), before heading back to the Little House to make some Elizabethan accessories - a fan and some shoe pom-poms.
To make the fan we printed with gold paint onto pre-cut paper, and when it was dry we folded it, used decorative cutters round the edge, then glued sticks of gold card (with holes at one end) onto the back, using a paper fastener to hold it all together at the bottom. The pom-poms are made from lengths of netting folded in half, tied off with a rubber band, and poked through a hole in a small doily. We added silver decorations with paper fasteners, then tied netting under the doily for attaching to shoes. Oh man these pom-poms are cute - Matthew asked me to tie them to his slippers when we got home and he's been prancing about like a dandy ever since.
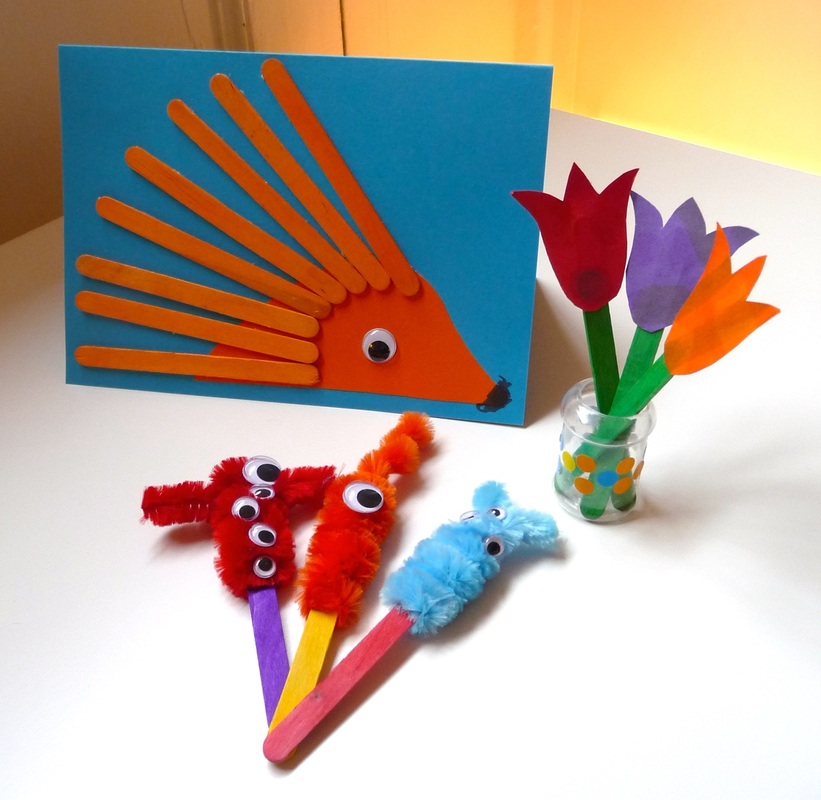
I was in a multicoloured lolly sticks kind of mood today - luckily we have a bumper pack of them in the cupboard. Phew.
For the porcupine card, I cut a body shape out of orange card and then we glued that and the orange sticks onto the blue card, added a googly eye and coloured in the nose.
The monsters on sticks couldn't be easier to make - just wrap pipe cleaners around sticks in whatever shape you fancy and add googly eyes (we used extra big fluffy pipe cleaners). Matthew's passion for googly eyes apparently knows no bounds.
For the tulips, we painted some bits of card first (quite subtle here but you could go wild), cut out the petal shapes when they were dry, and glued them onto green sticks. The vase is an empty plastic vanilla essence bottle with its top cut off. Matthew took ages decorating it with dotty stickers in an impressively painstaking way. Blimey. This is new.
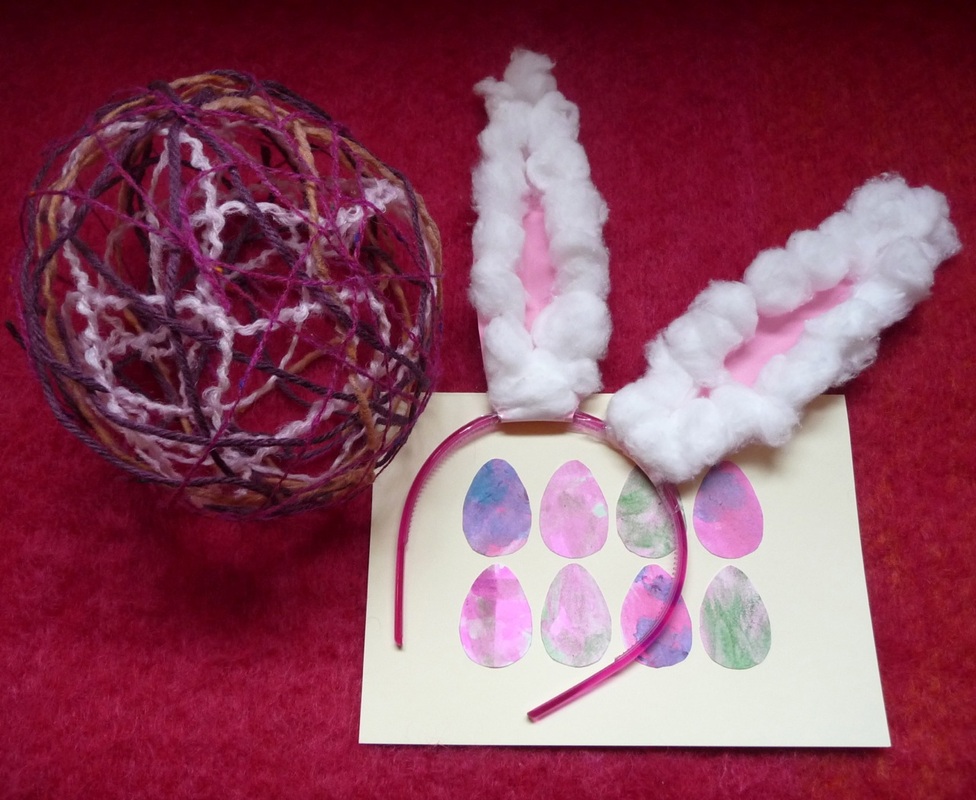
It's nearly Easter, so no big surprises here: it's all about the bunnies and eggs this week.
The woolly egg is something we made at The Little House in the Park. You need a partially blown up balloon, lengths of wool in different colours, and some watery glue. Just dunk the wool in the glue and wrap it round the balloon in lots of layers. When it's all dry, pop the balloon, and voila! A woolly egg. I think we could have done with using a smaller balloon and more wool, but it's still pretty effective and I love this idea. Wonder if it would work with balloon animals...?
For the card we used paint pens, which dry in really nice pastel shades. Matthew did loads of painting on different bits of paper and then I cut out some egg shapes from them which we stuck onto cream card.
The bunny ears are just cotton wool glued onto pink card cut and folded into ear shapes, then taped onto an alice band. I had to use quite a lot of tape to keep them upright - anyone have any tips about this?
Anyway - Happy Easter. May your eggs be of the highest quality chocolate.
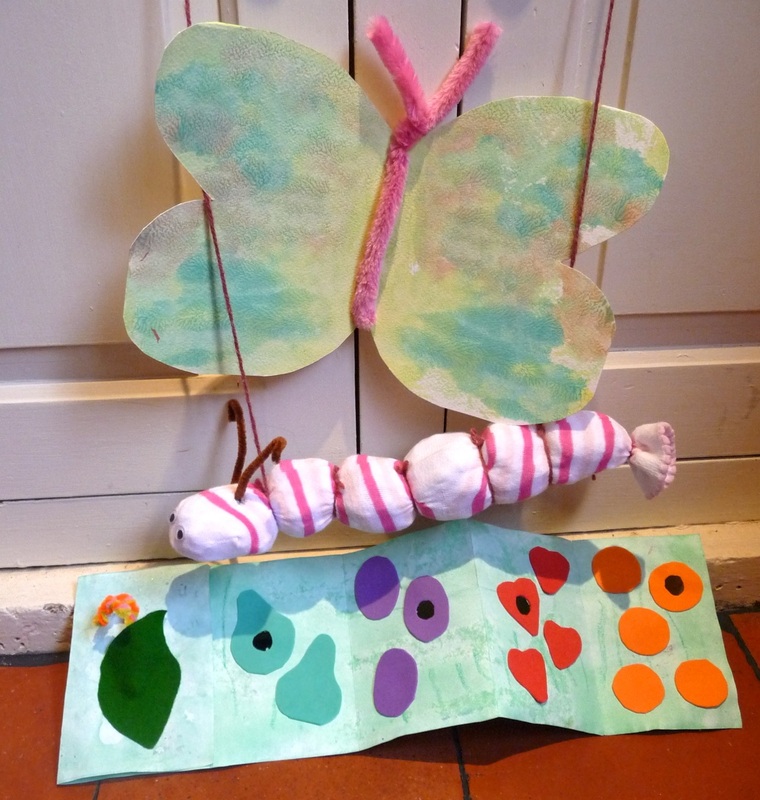
Last week at The Little House in the Park we did some book-related crafts, to mark the end of Bath's Literature Festival. The Very Hungry Caterpillar was a good choice - everyone knows it, the story is nice and simple, and there are lots of colourful pictures to draw inspiration from.
First we made a lovely big butterfly, by blobbing lots of paint on one side of some thick folded paper and then pressing the two sides together to make a mirror print. We cut the shape out when it was dry, and added a pipe cleaner body.
Next we stuffed a stripey sock with scrunched up tissue paper, tied it with wool, and added googly eyes and pipe cleaner antennae to make a caterpillar puppet. (This is Matthew's favourite: he likes bouncing it round the house doing squeaky caterpillar voices and finding new places to hang it.)
Finally, we made our own interactive version of the book. We started with a thin paint wash over both sides of a long strip of folded paper, and when that was dry we stuck the fruit on and cut out holes. The cover of the book is a green felt leaf with a pipe cleaner caterpillar nestled inside ready to take out and weave through the holes.
|


 RSS Feed